Posted on Leave a comment

Product Review: the adaptable Trekker Tent 1

River country products trekker 1 trekking pole tent backpacking tent set up next to river with sleeping pad

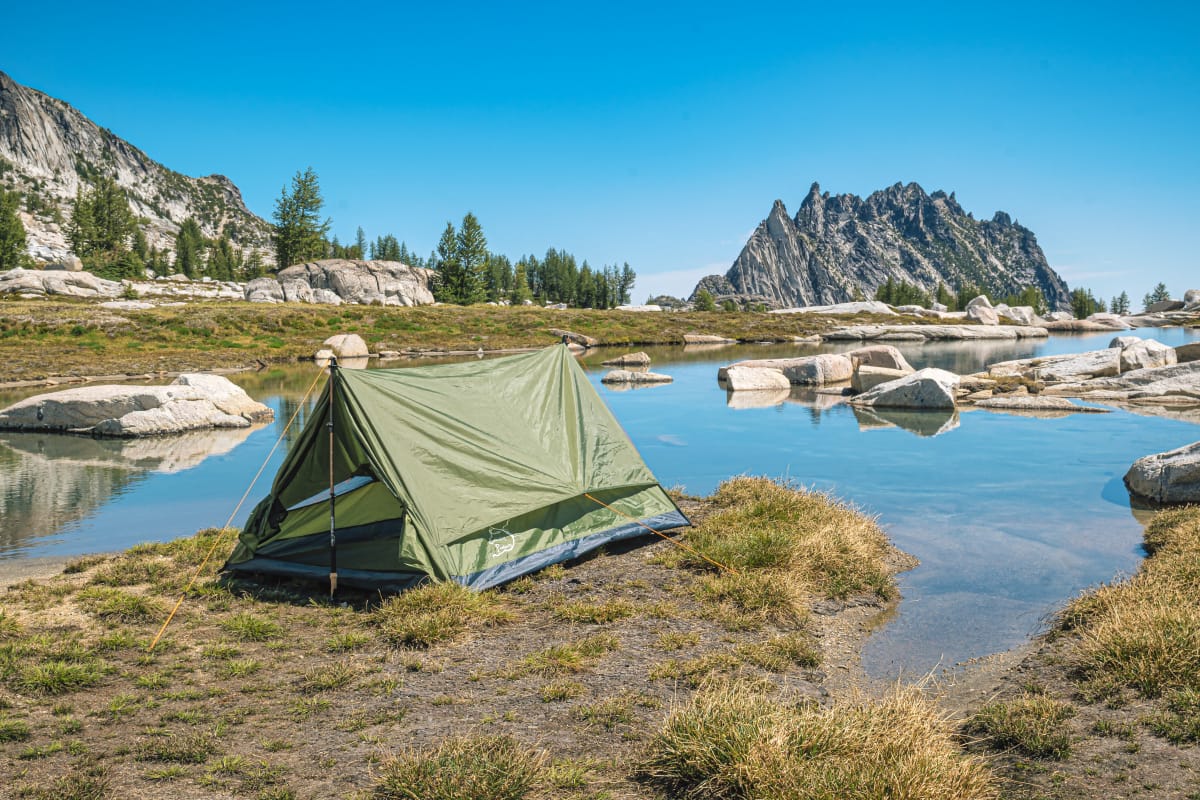
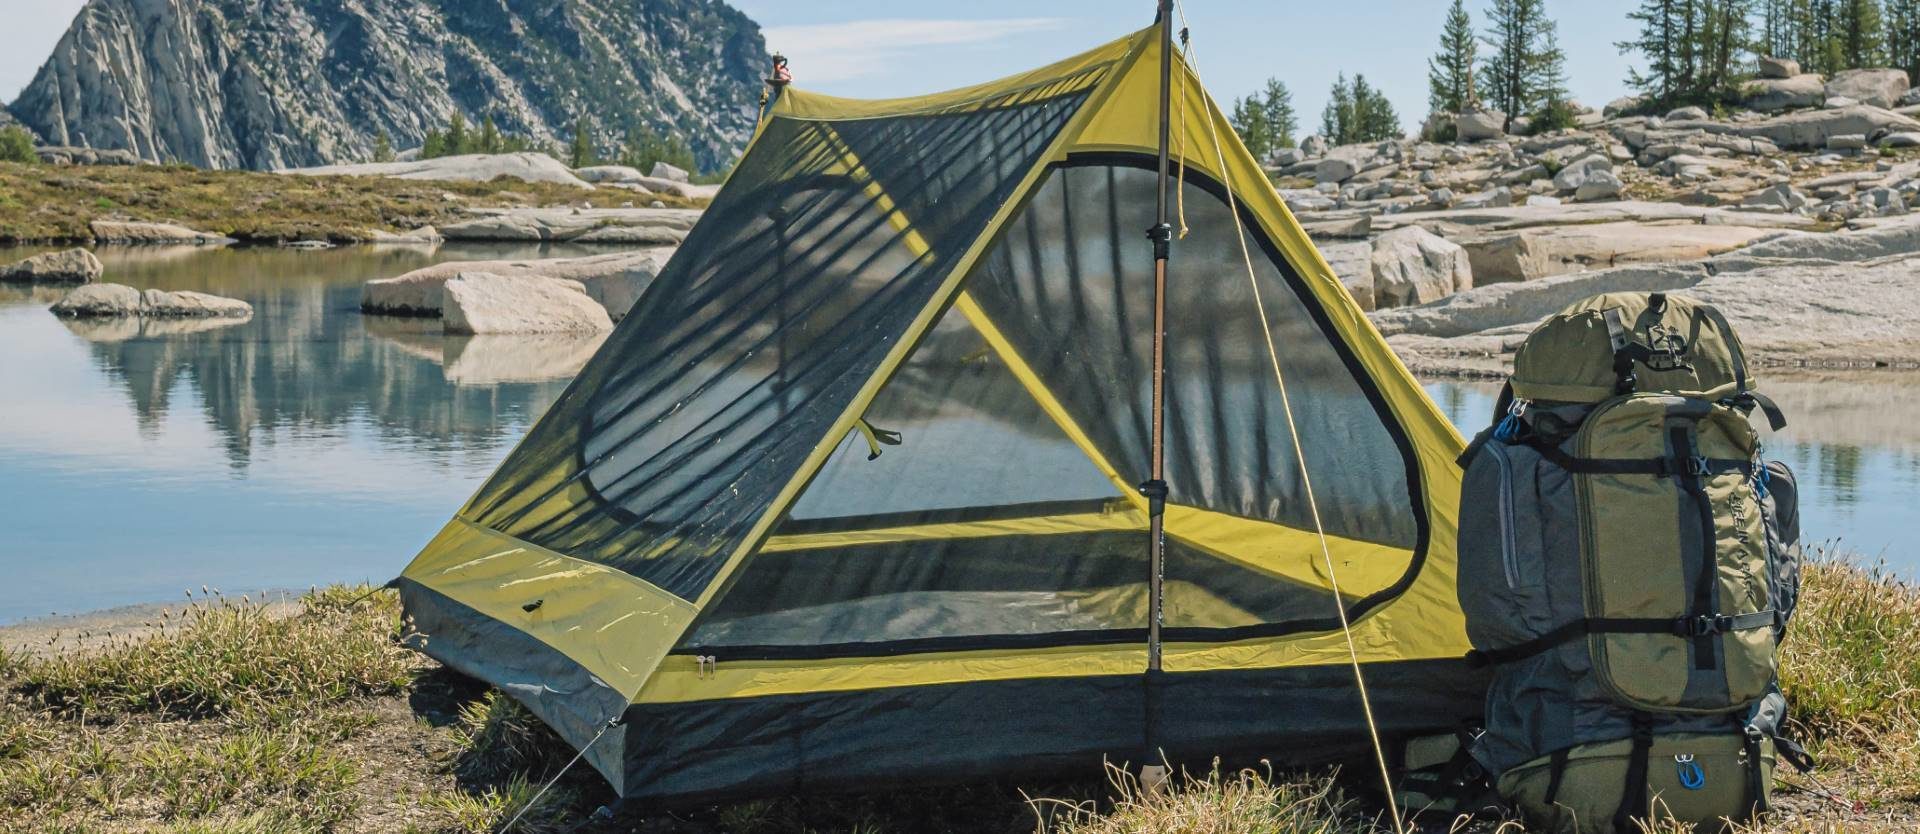
We’ve asked customers what they like about the Trekker Tent 1 and their top responses were first, how easy it is to set up and second, the fact that it has a large front vestibule.

First, it is one of the easiest in our line of trekking pole tents to set up. The single trekking pole design is the simplest design available. This means that you have the choice of hiking with only one trekking pole, and the ease of setup couldn’t be more straightforward. The quick setup time allows you time for any other activities you might have planned for the day.

Second, the large front vestibule offers plenty of room for all of your gear and a place to sit outside of the weather. This is a great alternative to the Trekker Tent 1V for those solo hikers, backpackers, and campers who don’t need additional ventilation.

river country products trekking pole tent twin sisters washington

Key Features

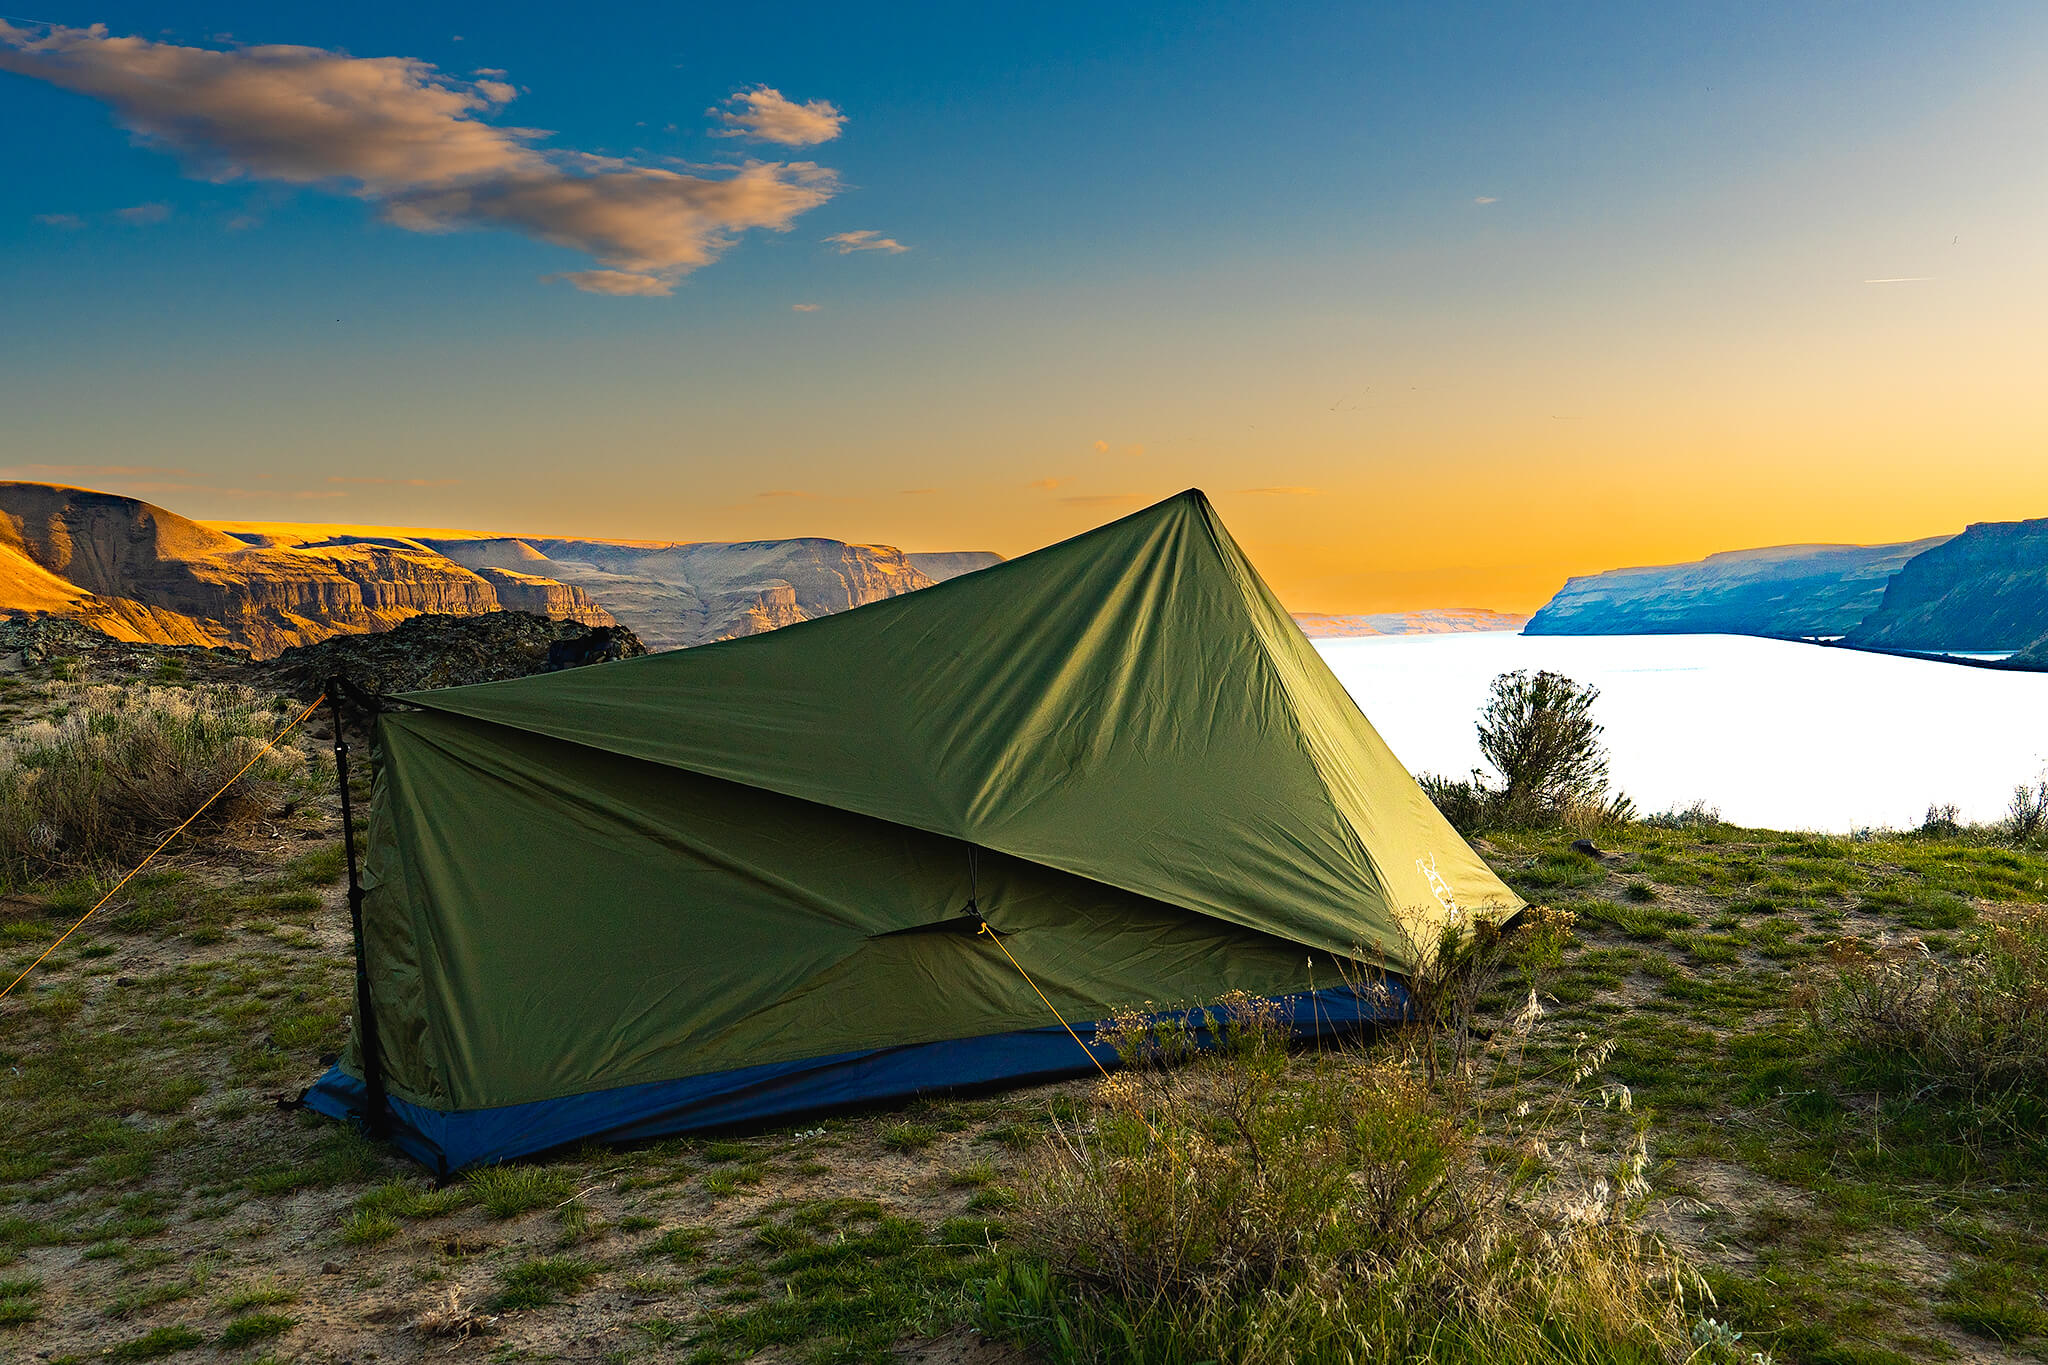
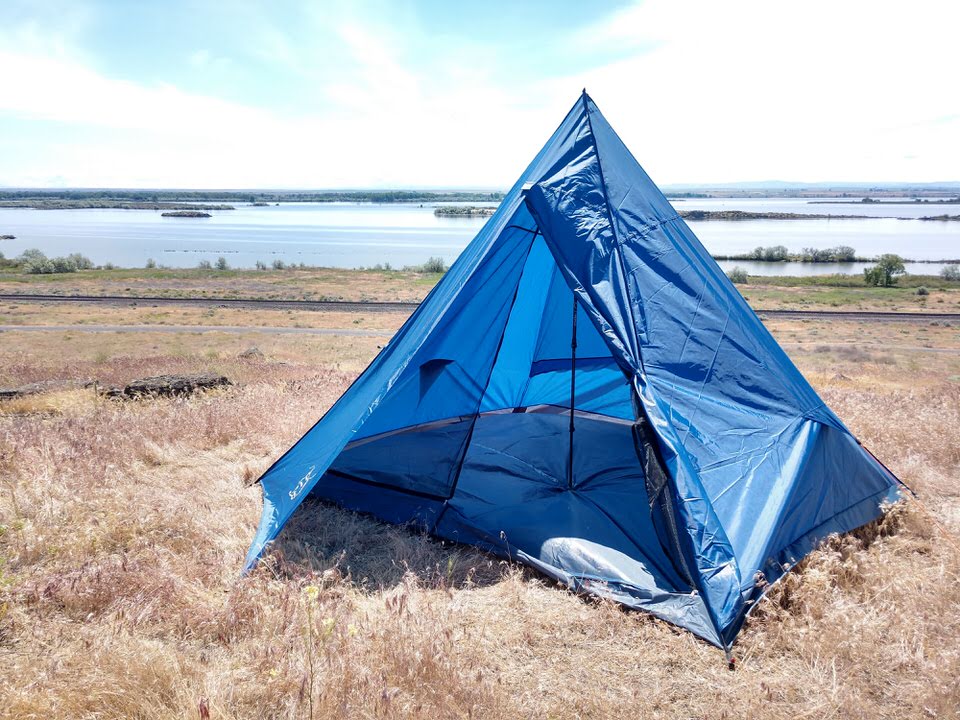
Some of the key features of the Trekker Tent 1 are that it is a single-pole trekking pole tent so it doesn’t have a complicated pole system and sets up very quickly. The tent weighs in at just 2 pounds, 13 ounces, which includes the nine tent stakes and the carry bag. When packed down, this tent is just 10″ by 5″ around. In other words, this is a light and easy-to-carry tent.

The stakes come rolled up in the center of the tent and the guy lines are already attached to the tent, so it’s ready for a quick setup. The interior of the tent is 90″ long by 38″ wide and the front door has a peak height of 48″.

It can be set up without a trekking pole if you have an overhanging branch. There’s a peak guy line loop and you can use your own guy line to attach to an overhanging branch and set up the tent without any trekking poles at all.

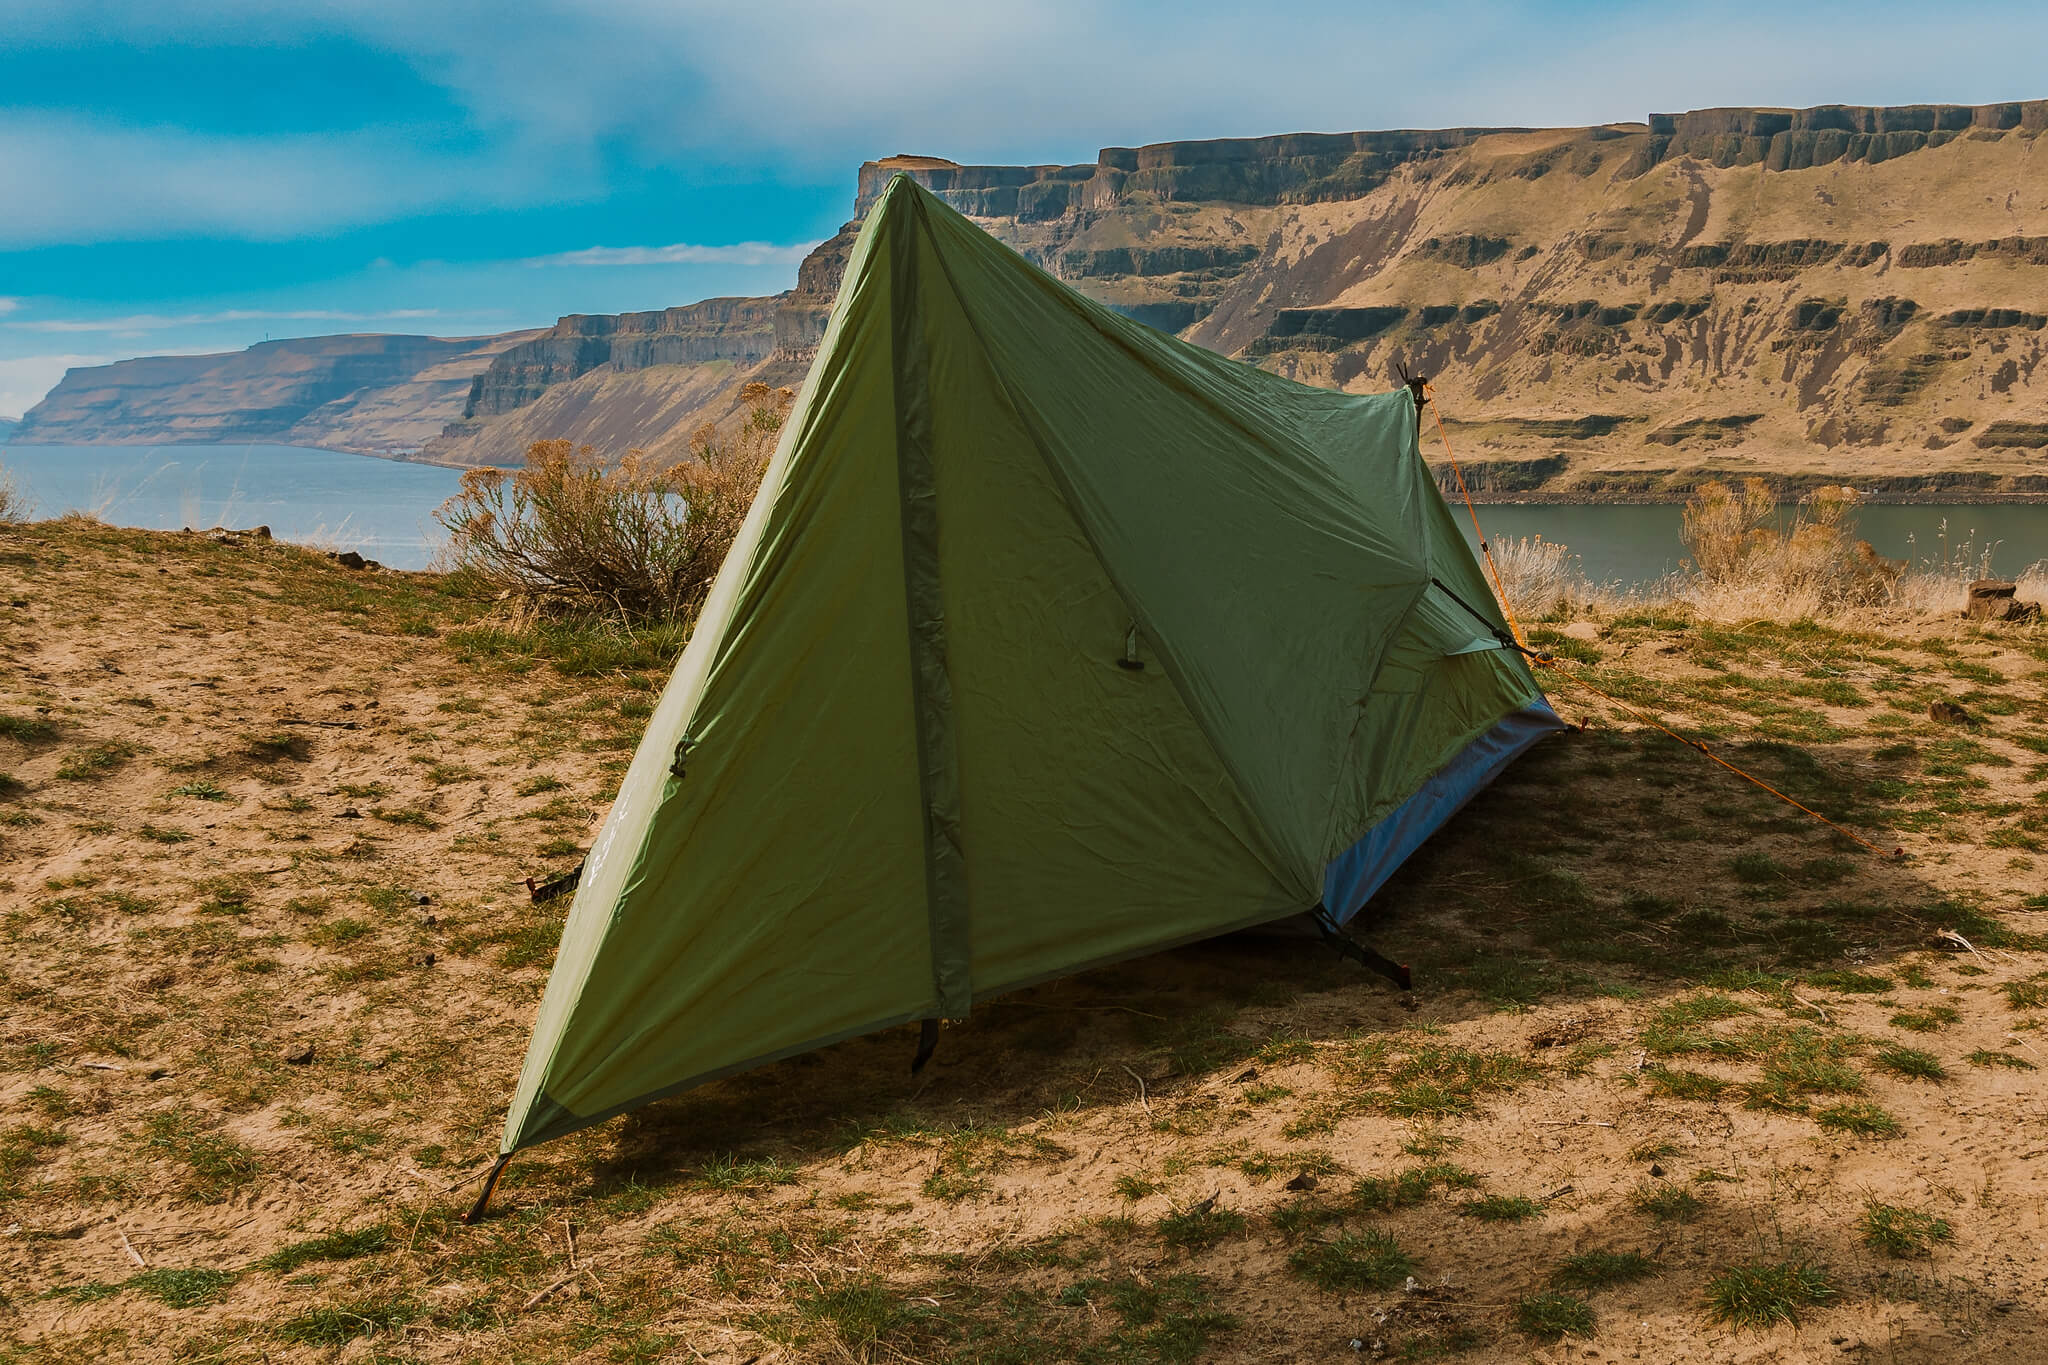
All seams are taped and the fabric is a PU-coated waterproof polyester and the floor is made out of a heavy duty waterproof Oxford taffeta fabric which is thick enough that you won’t need an additional ground cloth. Inside the tent you’ll find a loop for hanging your gear or your flashlight and a personal items pocket and plenty of room for you and your gear.

Easy Setup

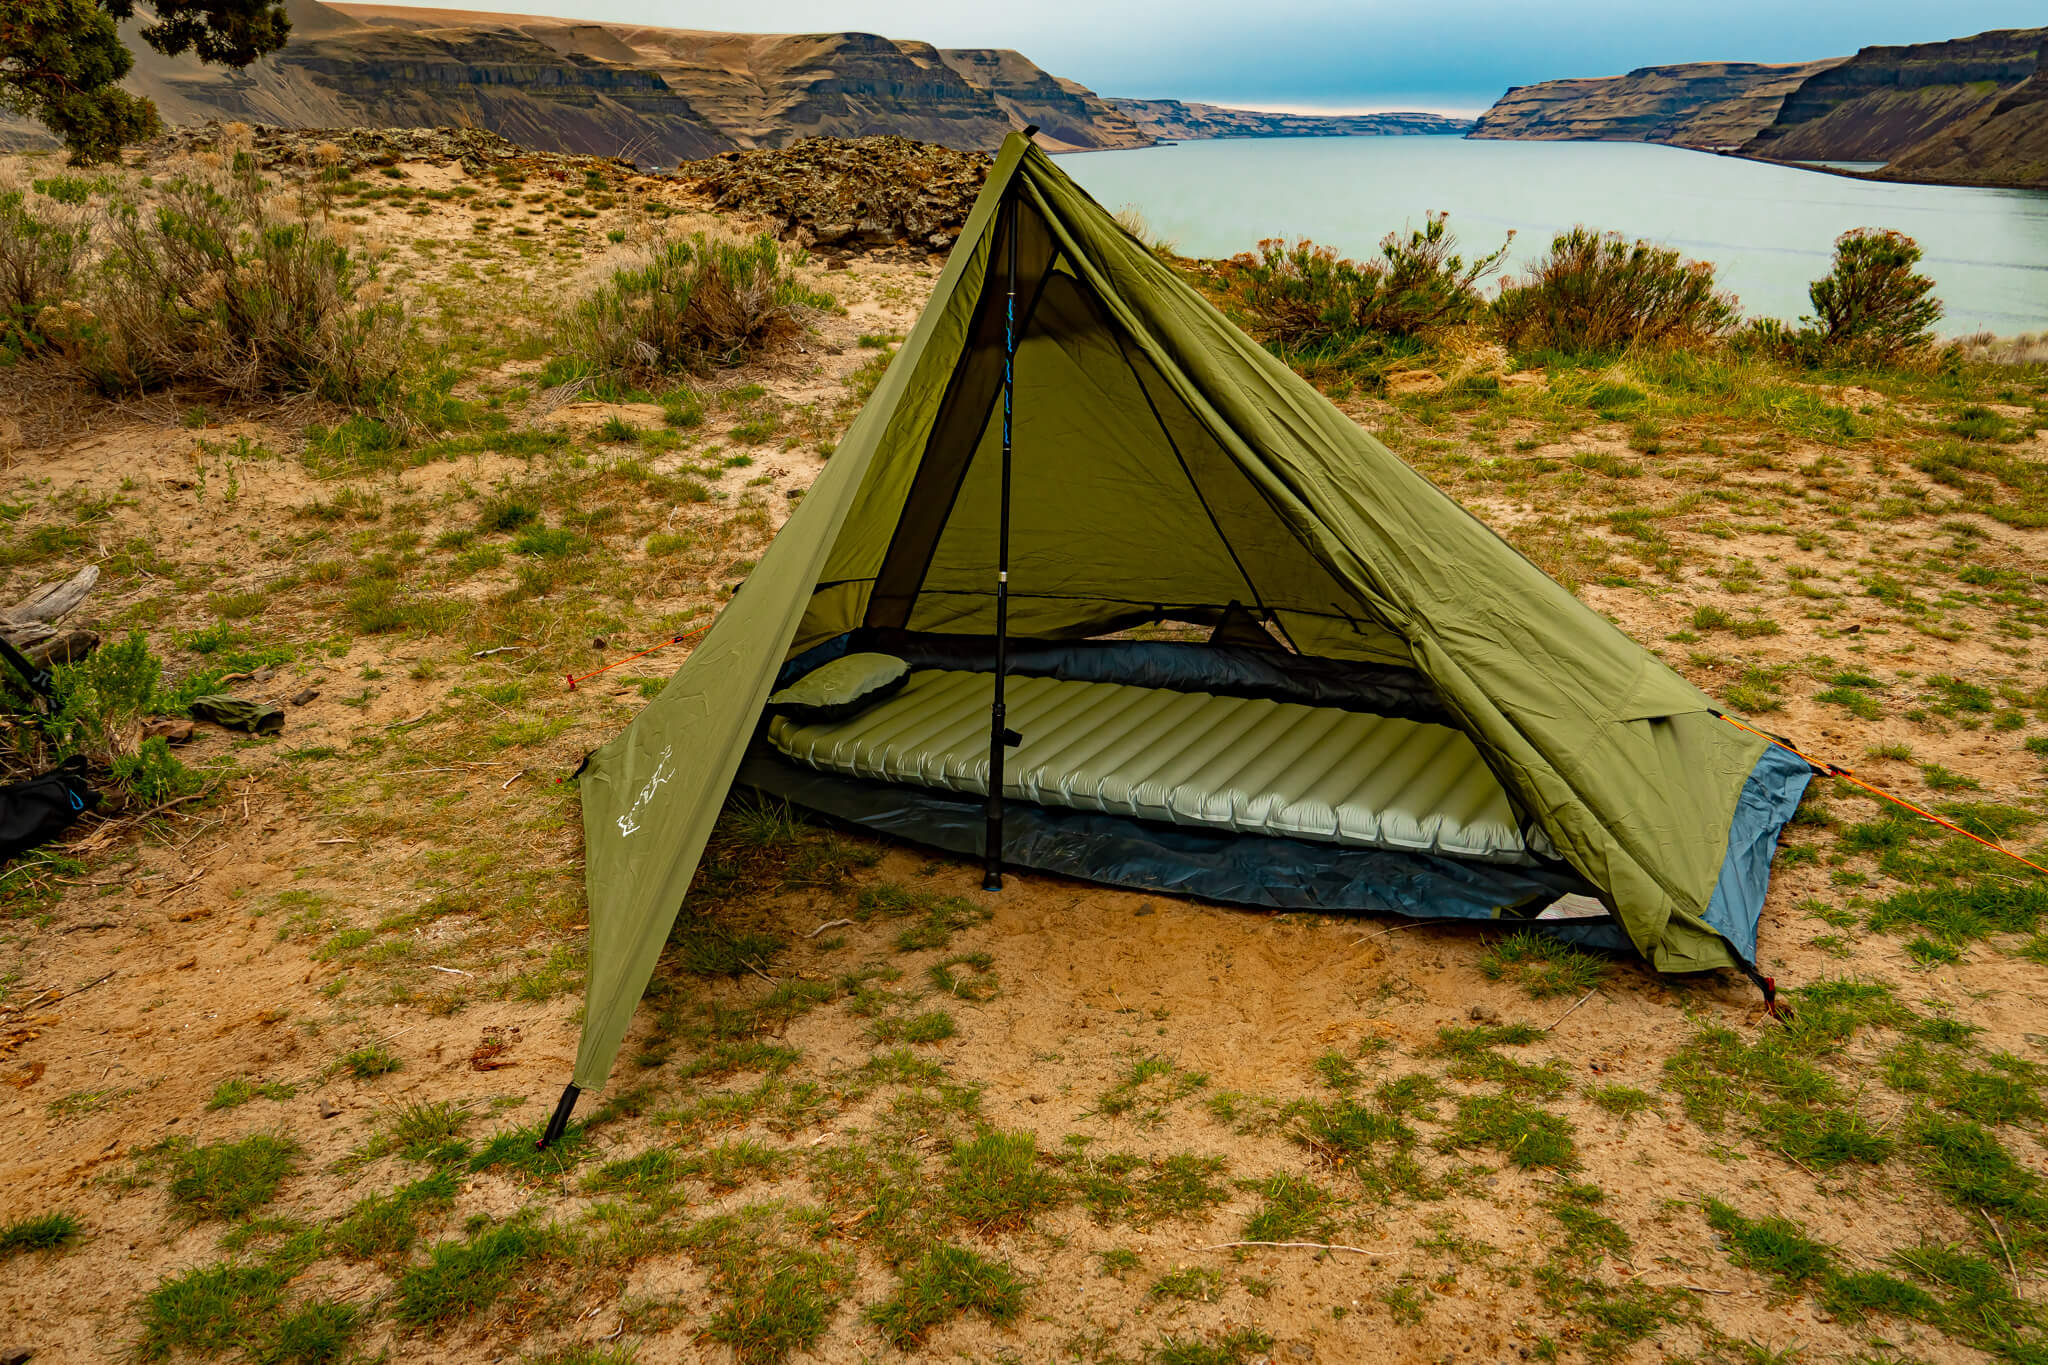
First, find a flat area and lay the tent out in the direction you want it to go. Like all trekking pole tents, start by staking down the four corners of the tent and make sure that the tent isn’t lopsided to one side or the other. Click this link if you prefer to watch a video.

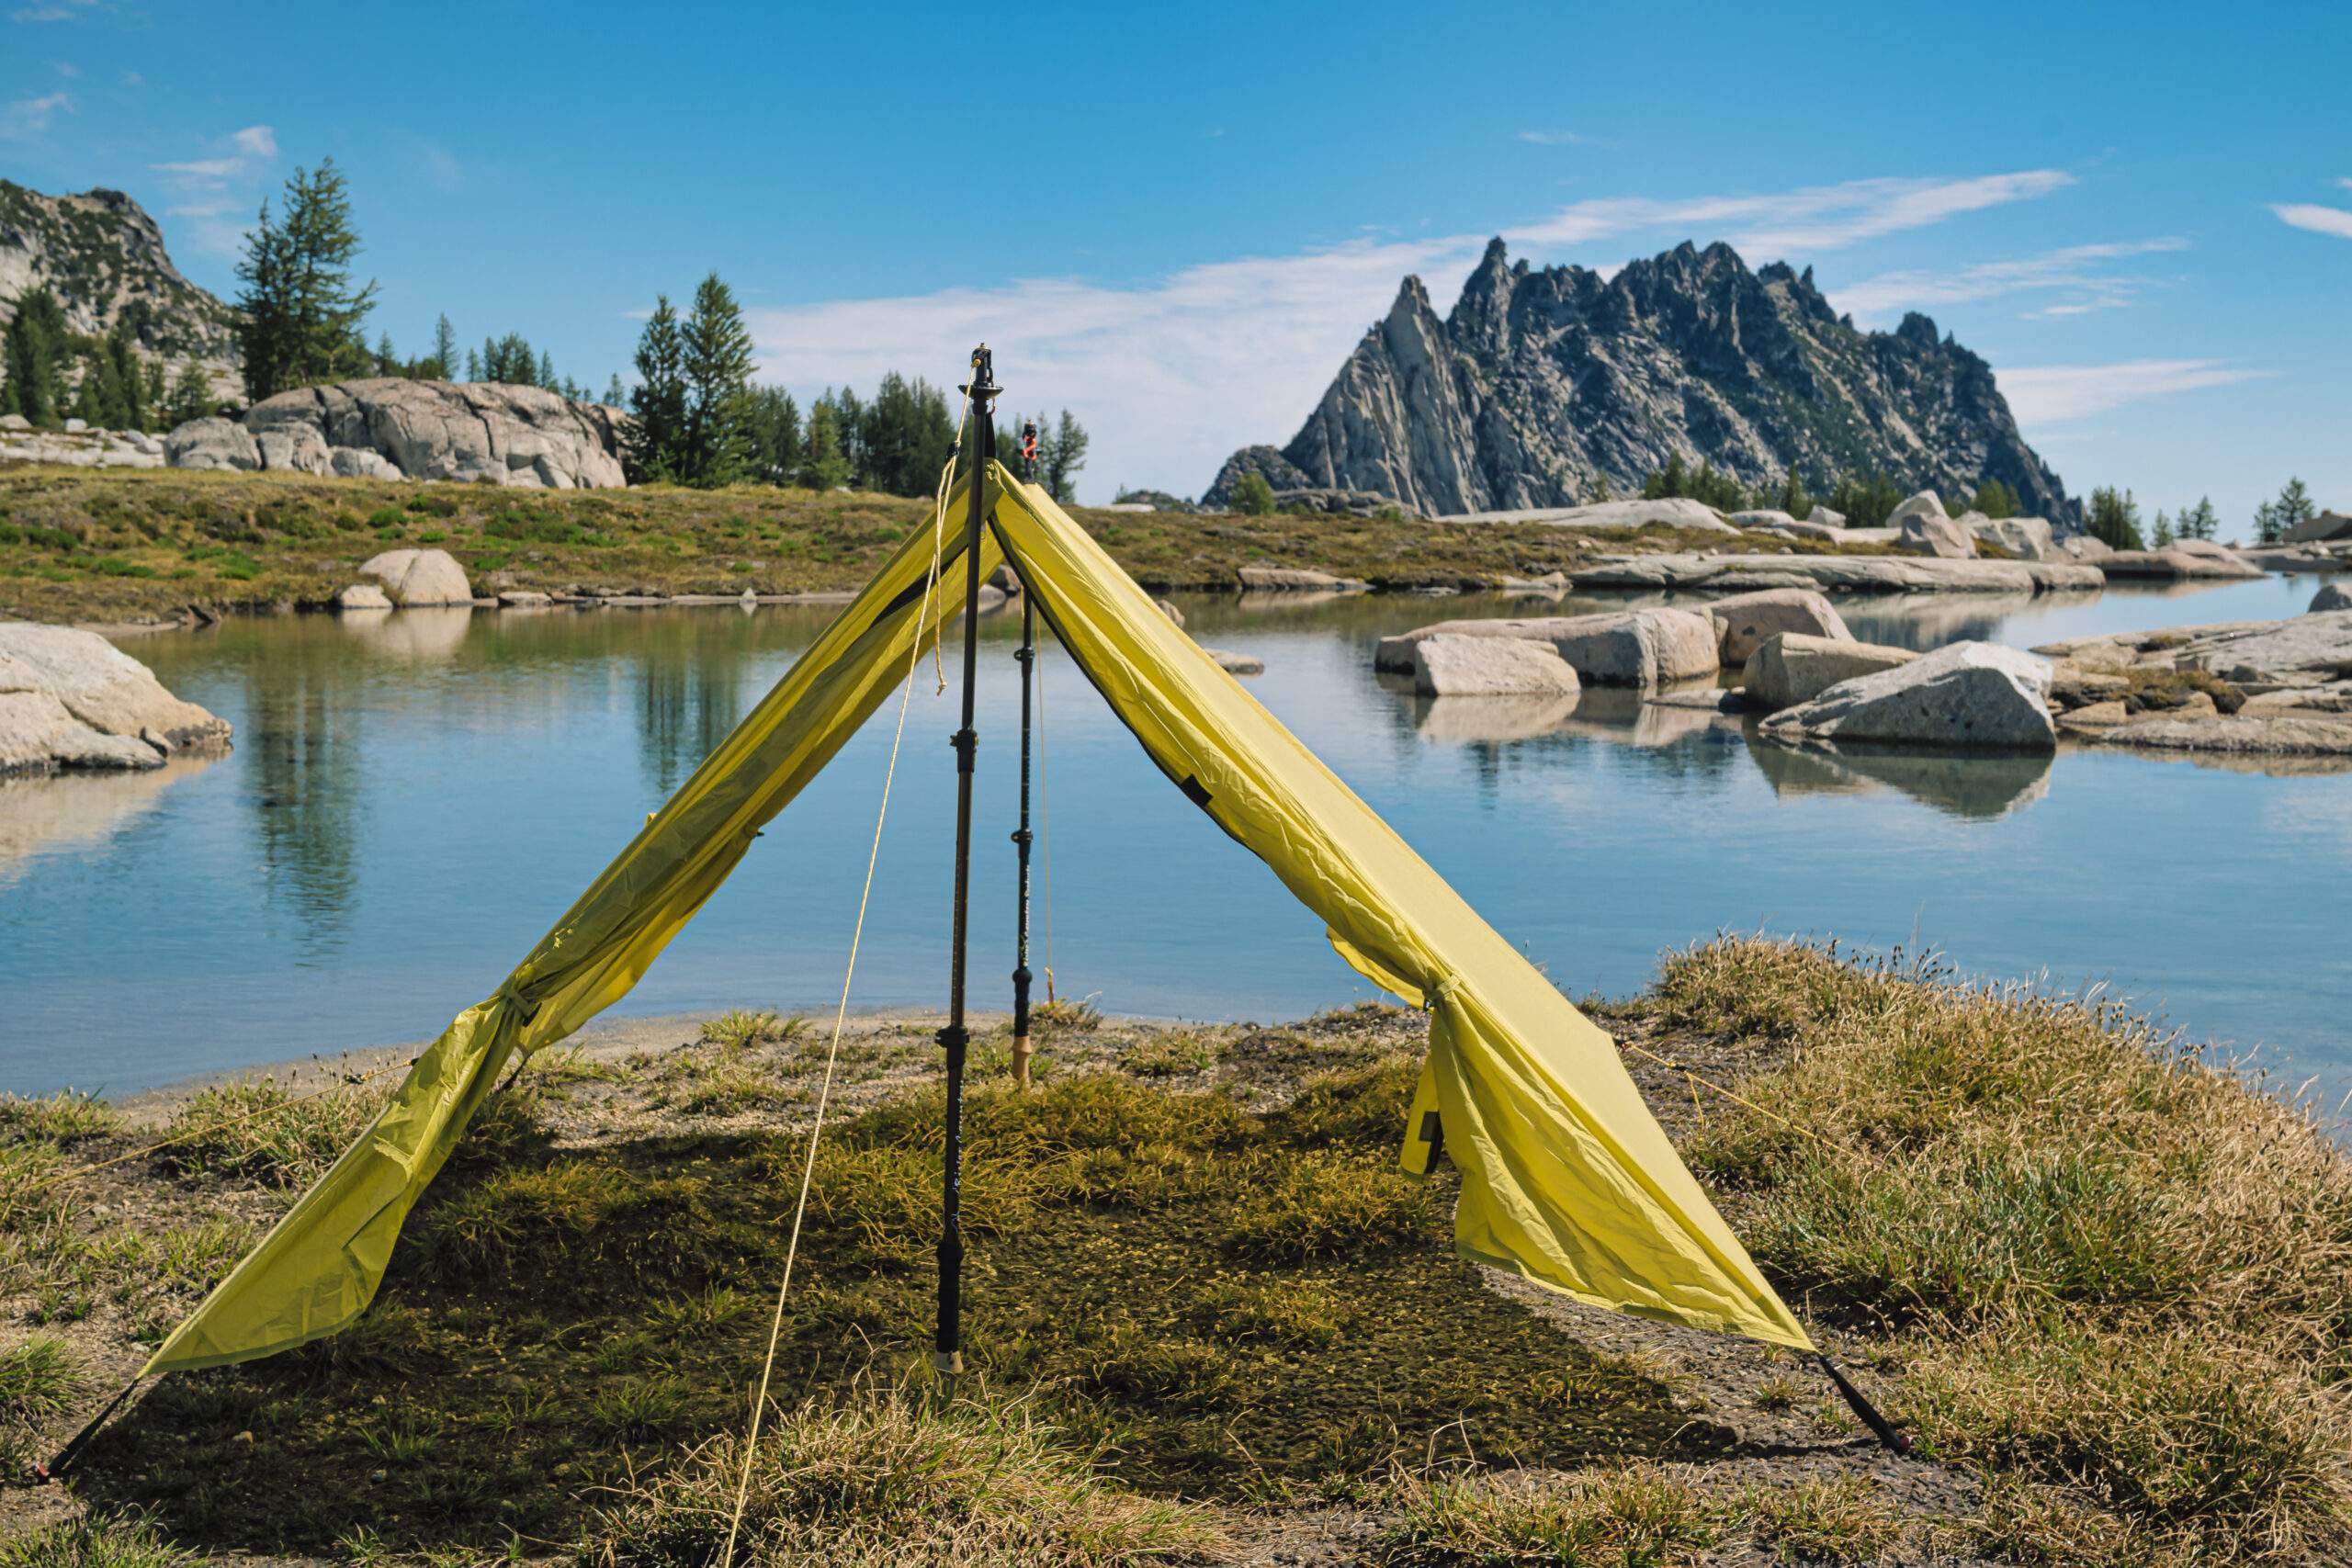
After you stake down the four corners of the tent, you’re ready to insert the trekking pole. Insert the trekking pole with the handle facing up or with the rubber tip facing up. Do not insert the trekking pole with the carbide tip facing up as that will rip the tent.

Adjust the trekking pole to the desired height and pull out the front vestibule. It’s best to have the front vestibule zipped up when staking out the front. After you’ve staked out the front vestibule, now you can stake out the rear guy line and the side guy lines. The back ceiling vent stakes out to the same guy line as the rear guy line.

Tips and tricks

This tent is unique because it can be set up without a trekking pole by setting it up under an overhanging branch and using a guy line or paracord to tie the peak loop of the tent to the overhanging branch.

When setting it up using this method, make sure that you stake down the four corners first. No peak guy line is included with this tent, so you’ll need to use your own paracord or guy line.

If you find that the rear corners of this tent are dipping or sagging in, there’s two common causes of this. One is sloped ground, which can cause the back corners to sag. Finding a flat area can solve this problem. Or, if you pull the rear corners too tight, it can cause the same problem. The best remedy is to move the rear corner stakes about two inches toward the center and then lengthen the trekking pole and tighten the front vestibule stake.

Be careful with the carbide tip and don’t put the carbide tip pointed up in this tent or it will rip right through this tent fabric.

Like all of our trekking pole tents, this tent is easy to take down. Just remove the stakes, put the guy lines and the rain fly onto the bottom portion of the tent. Fold the tent in onto itself so that just the floor fabric is showing and keep holding until what you have left is just a little wider than the tent stake bag. Roll the tent up around the stake bag and if you can find it, use the tie that came with the tent to tie around the tent. After that, it should easily fit back into the bag that it came in.

And that’s everything you need to know about the Trekker Tent 1, a lightweight, small-pack-size tent perfect for your next outdoor adventure. If you are having any problems with the setup of this tent, please don’t hesitate to contact us. We’re always happy to help.

Posted on 4 Comments

Product Review: the airy Trekker Tent 2.2

Trekker Tent 2.2

We’ve asked our customers what they like about the airy Trekker Tent 2.2, and their top two responses were first, how easy it is to set up, and second, how well ventilated it is.

First, it is one of the easiest tents you could ever set up. It can be set up in under two minutes and can be set up with or without trekking poles. For the hiker in a hurry, this is the perfect option. You can get your tent set up quickly and have more time for fishing, hunting, or just relaxing.

Second, the large mesh sidewalls increase the ventilation in the tent, making it more comfortable to sit in and also reducing condensation. As compared to the Trekker Tent 2 and 2V, this tent is best for those wanting additional ventilation and don’t need the space provided by a vestibule.

Trekker Tent 2.2

Key Features

Some of the key features of the Trekker Tent 2.2 include the fact that it is a trekking pole tent, meaning that you may only need to check two poles (aka “hiking sticks”) before heading out for a camping trip.

However, even if you don’t have trekking poles, we like to say, “No poles, no problem!” Although it’s a trekking pole tent, we designed it so that it can easily be set up with two sticks off the ground, or you can tie it between two trees.

The tent weighs in at just 3 pounds, 2 ounces, which includes the eight tent stakes and the carry bag. By industry standards, this is a lightweight tent. It’s also pretty small. When it’s packed down, it’s just 10 inches by 6 inches around.

The stakes come rolled up in the center of the tent and the guy lines are already attached to the tent, so it’s ready for a quick setup.

The interior of the tent is 7 feet long by 5 feet wide and the front door has a 42-inch peak height.

All seams are taped and the fabric is waterproof PU-coated polyester. The floor is made of a heavy duty waterproof Oxford taffeta fabric, which is thick enough that you won’t need an additional ground cloth with this tent.

Inside the tent you’ll find a loop for hanging your gear or your flashlight and a personal items pocket and plenty of room for two people and their gear.

Easy Setup

The Trekker Tent 2.2 is our easiest tent to set up. First, find a flat area to lay your tent out in the direction that you want it to face. If you prefer to watch a video, just click on this link.

Like all of our trekking pole tents, start by sticking down the four corners of the tent. Pull the tent tight as you stake down the corners and make sure that the tent is not lopsided to one side or the other.

After you stake down the four corners, insert the front trekking pole tip facing up placing the carbide tip into the grommet with the handle down. Adjust the trekking pole height to the desired height and pull out the guy line and stake it down.

Do the same with the rear trekking pole. Now you can stake out the two side guy lines and that’s really all there is to setting up the Trekker Tent 2.2.

Tips and tricks

First, this tent can be set up easily without trekking poles. Just use two sticks off the ground. When using the stick method, just wrap the guy line around the stick once near the peak of the tent. Then stake the guy line to the ground, or you can tie the guy line to a branch or tree.

Second, all stakes should go in at a 30-degree angle toward the tent, forming a 90 degree angle with the guy line and the stake. This will help hold the stake in place.

If setting up on sandy ground, you may need snow or sand stakes which can be purchased separately. There are a few tips and tricks when setting up on softer ground, like putting a rock on top of the stake to hold it in place or a tree branch which can also mark where the guy lines are to make it easier to see and help avoid walking into the guidelines. If the tent is sagging in the middle, this is often because the trekking poles are overextended. Try lowering the trekking pole just a little and tightening the rear and front guy lines, and that should tighten the ridgeline of the tent.

This tent’s even easier to take down than to set up. All you have to do is pull out the stakes then put all the guy lines and all the upper tent material inside the tent and then fold the tent in on itself so that only the floor material is showing. Once you have it to about the size of the tent stake in width, roll the tent up around the tent stakes, and then tie it off and it should fit easily back into the bag that it came in.

And that’s all there is to know about the airy Trekker Tent 2.2, one of our most popular two-person trekking pole tents and our easiest tent to set up with its small pack size and the fact that it’s lightweight. This tent is perfect for your next outdoor adventure!

If you are having any problems with the setup of this tent, please don’t hesitate to contact us by email or through the Contact Us page. We’re always happy to help! If you have any tips, tricks, questions or feedback please comment below.

Posted on 1 Comment

Product Review: the roomy Trekker Tent 2V

river country products trekking pole tent twin sisters washington

We’ve asked our customers what they enjoy about the roomy Trekker Tent 2V, and, like the Trekker Tent 1V the top three things were the removable rainfly, the large vestibule, and the large amount of ventilation.

First, everyone enjoys the removable rainfly because you have the option of sleeping under the stars on a warm summer night or protecting yourself from the elements when it’s not warm and dry.

Second, they love the large vestibule for storing all of their gear and because it makes it easier to sit or lay in the tent protected from the weather. As compared to the Trekker 2 and 2.2, the added vestibule on this tent makes it best for those hiking and camping with extra gear.

Third, it’s easy to enjoy the large amount of ventilation which helps reduce condensation, especially in this roomy two-person tent.

Trekker Tent 2V

Key Features

Some of the key features of the Trekker Tent 2V is that it is a trekking pole tent, so it doesn’t have a complicated pole system. Also, the tent weighs in at just 3 lbs 6 oz, which includes the 8 tent stakes and the carry bag. This, by industry standards, is a lightweight tent. It’s also small. When packed, this tent packs down to just 10 inches long by 6 inches around.

The stakes come rolled up in the center of the tent and the guylines are already attached to the tent so it’s ready for a quick setup.

The interior of this roomy, two-person tent is 7 feet long by 6 feet in the front and 32” in the back with a 42” peak height. There’s about 34 square feet of floor space, plus 6 square feet in the oversized vestibule.

All seams are taped and the fabric is waterproof PU-coated polyester. The floor is made from a heavy-duty waterproof oxford taffeta fabric, which is thick enough that you won’t need an additional ground cloth with this tent. Inside the tent, you’ll find a loop for hanging your flashlight or other gear and a personal items pocket, and plenty of room for two people and your gear.

Easy Setup

First, find a flat area, and lay your tent out in the direction you want it to face. Click on this link if you prefer to watch a video.

Like all trekking pole tents, you’ll next start by staking down the four corners of the tent first. Pull the tent tight as you stake it down. Pull the tent tight and make sure that the tent is not lopsided in one direction or another.

After you stake down the four corners, insert the trekking pole into the front grommet, tip facing up, handle facing down. Adjust the trekking pole to the desired height and pull out the guyline and stake it down. Then tighten the guyline.

Do the same on the other side of the tent by adjusting the second trekking pole to the desired height, and pull out the guyline and stake it out. Then tighten the guyline.

Then, stake out the side guylines and you are ready to attach the rainfly. You may need to adjust the front stake position to get the rainfly vestibule tight. The front stake is intended to be used for both the front guyline and the rainfly vestibule. And that’s all there is to setting up the Trekker Tent 2V.

Tips and tricks

First, zip up all the doors. It’s easier to pull the tent and vestibule tight when the doors are secured. Then, insert the stakes at a 30-degree angle forming a 90-degree angle between the guyline and the tent stake. This will help hold the tent stake and the tent in place.

If setting up on sandy or snowy ground, you may need to purchase sand and snow stakes, which are made to hold in those settings. But there are some tricks you can use like setting a rock or tree branch on top of the stake to hold the stake in the ground.

Also, setting a rock or stick on top of the stake gives you a visible marker, making it easier to avoid walking into the guylines. If there is a significant wind, it’s best to set the tent up so the front is facing the wind. Because of the shape of the rainfly, if the wind is strong and coming from the rear of the tent, you’ll notice the wind a lot more inside the tent. If the tent is sagging in the middle, it’s often because the trekking poles are overextended. Try lowering the trekking poles a little bit and tightening the rear and front guylines and the front vestibule. That should tighten up the ridgeline of the tent.

Be careful with the carbide tips on the trekking poles because they are sharp and can rip the fabric on the tent. If you break or lose one of your trekking poles, this tent can easily be set up with a stick or the rear guyline can be tied to a tree.

This tent is even easier to take down then to set up. Just remove all the stakes, put the guylines and the rainfly on top of the tent, and fold the tent on top of itself, into thirds, to a width just wider than the stake bag. Roll the tent around the stake bag, and if you can find it, use the tie that came with the tent to tie around the rolled-up tent. After that, it should fit easily right back into the bag it came in.

That’s everything you need to know about the enjoyable Trekker Tent 2V, a lightweight, small-packed size two-person tent perfect for your next outdoor adventure! If you’re having any problems with the setup of this tent, please don’t hesitate to contact us by email or through the Contact Us page. We’re always happy to help.

Posted on Leave a comment

Product Review: the enjoyable Trekker Tent 1V

river country products trekking pole tent twin sisters washington

We’ve asked our customers what they enjoy about the Trekker Tent 1V, and the top three things were the removable rainfly, the large vestibule, and the large amount of ventilation.

First, everyone enjoys the removable rainfly, because you have the option of sleeping under the stars on a warm summer night.

Second, they love the large vestibule for storing all of their gear and because it makes it easier to sit in the tent protected from the weather.

Third, it’s easy to enjoy the large amount of ventilation which helps reduce condensation.

Trekker Tent 1v - one man backpacking tent

Original Trekker Tent 1V before adding a removable rainfly

Key Features

Some of the key features of the Trekker Tent 1V is that it is a trekking pole tent, so it doesn’t have a complicated pole system. Also, the tent weighs in at just 2 lbs 10 oz, which includes the 8 tent stakes and the carry bag. This, by industry standards, is an ultralight tent. It’s also small. When packed, this tent packs down to just 10 inches by 5 inches around.

The stakes come rolled up in the center of the tent and the guylines are already attached to the tent so it’s ready for a quick setup.

The interior of the tent is 7 feet long by 48” in the front and 32” in the back with a 42” peak height. There’s about 24 square feet of floor space, plus 5 square feet in the oversized vestibule.

All seams are taped and the fabric is waterproof PU coated polyester. The floor is made from a heavy duty waterproof oxford taffeta fabric, which is thick enough that you won’t need an additional ground cloth with this tent. Inside the tent, you’ll find a loop for hanging your gear or your flashlight and a personal items pocket, and plenty of room for both you and your gear.

Easy Setup

First, find a flat area, and lay your tent out in the direction you want it to face. Click on this link if you prefer to watch a video.

Like all trekking pole tents, you’ll next start by staking down the four corners of the tent first. Pull the tent tight as you stake it down. Pull the tent tight and make sure that the tent is not lopsided in one direction or another.

After you stake down the four corners, insert the trekking pole into the front grommet, tip facing up, handle facing down. Adjust the trekking pole to the desired height, and pull out the guyline and stake it out. Then tighten the guyline.

Do the same on the other side of the tent by adjusting the second trekking pole to the desired height, and pull out the guyline and stake it out. Then tighten the guyline.

Then, stake out the side guylines and you are ready to attach the rainfly. You may need to adjust the front stake position to get the rainfly vestibule tight. The front stake is intended to be used for both the front guyline and the rainfly vestibule. And that’s all there is to setting up the trekker tent 1V.

Tips and tricks

First, zip up all the doors. It’s easier to pull the tent and vestibule tight when the doors are zipped up. Then, insert the stakes at a 30 degree angle forming a 90-degree angle between the guyline and the tent stake. This will help hold the tent stake and the tent in place.

If setting up on sandy ground or on snow, you may need to purchase sand and snow stakes, which are made to hold in those settings. But, there are some tricks you can use like setting a rock or tree branch on top of the stake to hold the stake in the ground.

Also, setting a rock or stick on top of the stake gives you a visible marker, making it easier to avoid walking into the guylines. If there is a significant wind, it’s best to set the tent up so the front is facing the wind. Because of the shape of the rainfly, if the wind is strong and coming from the rear of the tent, you’ll notice the wind a lot more inside the tent. If the tent is sagging in the middle, it’s often because the trekking poles are overextended. Try lowering the trekking poles a little bit and tightening the rear and front guylines and the front vestibule. That should tighten up the ridgeline of the tent.

Be careful with the carbide tips on the trekking poles because they are very sharp and can rip the fabric on the tent. If you break or lose one of your trekking poles, this tent can be set up with a stick or the rear guyline can be tied to a tree.

This tent is easier to take down then to set up. Just remove all the stakes, put the guylines and the rainfly on top of the tent, and fold the tent on top of itself, into thirds, to a width just wider than the stake bag. Roll the tent around the stake bag, and if you can find it, use the tie that came with the tent to tie around the rolled up tent. After that, it should fit easily right back into the bag it came in.

That’s everything you need to know about the enjoyable Trekker Tent 1V, a lightweight, small-packed size tent perfect for your next outdoor adventure! If you’re having any problems with the setup of this tent, please don’t hesitate to contact us by email or through the Contact Us page. We’re always happy to help.

Posted on Leave a comment

Product Review: the one and only Trekker Palace

The one and only Trekker Palace is the ultimate two-Person two-Layer silnylon (aka ultralight) trekking pole tent for all of your outdoor adventures. Ok, maybe not all, but it is a versatile tent. This high-end tent is designed to impress even the most seasoned outdoor enthusiasts with its outstanding features and benefits.

backpacking trekking pole tent set up near water

Key Features

One of the key features of the Trekker Palace is its full 2-Layer design, which allows you to set it up in various configurations, depending on your needs. Unlike traditional tents that come with complicated pole systems, the Trekker Palace is designed to be ultra-light, compact, and easy to set up in just 1-2 minutes. You’ll love how simple it is to use trekking poles for support, and the ability to set up each layer separately or together.

Another key feature that sets the Trekker Palace apart from other tents is its ability to be set up in three different configurations. You can set it up with the outer shell only, like a tarp tent. Or, you can set it up with the inner mesh tent only so you can stargaze or keep cool on a warm summer night. Or, you can use both layers together for a two-layer tent that provides you with unparalleled protection and comfort.

backpacking trekking pole tent outer shell set up near water

With its durable 2-layer design, the Trekker Palace offers several benefits that traditional tents simply can’t match. The outer layer provides you with an additional barrier against the elements, helping to keep you dry and warm in inclement weather. Meanwhile, the inner mesh tent provides excellent ventilation, keeping you cool and comfortable even in hot and humid conditions. And you can get it at a fraction of the price of comparable tents.

And, let’s not forget about the weight savings. At just a fraction of the weight of traditional tents, the Trekker Palace is ultra-light and easy to carry in your pack, making it the perfect choice for backpacking, hiking, and other outdoor activities when you demand the best.

Specifications

Packed Weight
3 lbs 3 oz/ 1.45 kg

Weight w/o stakes and bag
2 lbs 12 oz/ 1.25 kg

Inner Tent Weight
1 lb 8 oz/ .68 kg

Outer Shell Weight
1 lb 4 oz/ .57 kg

Packed Size
10.5 x 5.5 in

Floor Area
84 x 60 in/ 35 sq ft

Includes
8 carabiners, 8 ultra-light aluminum stakes, guylines, waterproof carry bag

Outer Shell Fabric
SilNylon

Inner Tent Fabric
No-See-Um Mesh Upper, SilNylon Floor

Wrapping it up

So, whether you’re planning a weekend camping trip or a long-distance trek through the wilderness, the Trekker Palace is the ultimate tent for your needs. Don’t settle for anything less – choose the Trekker Palace and experience the best that outdoor camping has to offer! Check out this video for a more in-depth review.

Posted on 2 Comments

Explore the best tent fabrics for your next backpacking adventure

backpacking trekking pole tent outer shell set up near water

There are so many fabrics out there, it’s hard to decide which one will be best for your next backpacking adventure. We’re going to help make that easier for you. First, we’ll suggest what fabrics probably won’t work. Then, we’ll tell you what we use for our tents. And then we’ll wrap up with the near future of tentmaking.

First, unless you are glamping and backpacking in the same trip, you will want to avoid any natural (i.e., plant or animal) fabrics. Cotton, wool, and hemp materials all have their benefits, ranging from breathability and aesthetics to durability and sustainability. But, they are so incredibly heavy that only strongman competitors dare carry them with their pack, so we’re not going to review them here. They also tend to soak up moisture at an incredible rate. On to the synthetic fabrics we use for our tents.

Top synthetic fabrics

Polyester, nylon, and silnylon are all synthetic fabrics that we have used for River Country Products tents. Polyester has been the primary choice for our intro line of Trekker tents, and silnylon has been the primary choice for our intermediate line of Trekker tents. Here are the main differences between them:

Polyester

Polyester is a synthetic fabric made from petroleum-based materials. It is known for its durability, wrinkle resistance, and resistance to UV rays. These characteristics make it an excellent choice for outdoor clothing and gear. Polyester is also relatively affordable and easy to care for. However, it is not as breathable as natural fibers like cotton, and it can be prone to pilling (little lint balls) over time.

Pros: Waterproof, inexpensive, light, durable

Cons: Needs good ventilation

Nylon

Nylon is another synthetic fabric made from petroleum-based materials. It is known for its strength, abrasion resistance, and water resistance. These features make it an excellent choice for outdoor gear like tents and backpacks. Nylon is also lightweight and quick-drying. However, it can be less durable than polyester and can break down over time when exposed to UV rays.

Pros: Same as polyester above, but more breathable (less moisture in the tent)

Cons: Not as durable as polyester, not as much UV protection or UV durability

Silnylon

Trekker Pyramid in the Enchantments

Silnylon is a type of upgraded nylon that has been treated with a silicone coating to make it even more water-resistant. It is commonly used in outdoor gear like tents and tarps, because it is lightweight, strong, and highly waterproof. Silnylon is also less prone to stretching than regular nylon and has a slippery surface that makes it easier to pack up. However, it can be more expensive than regular nylon, and the silicone coating can wear off over time with use.

Pros: Same as nylon above, but more waterproof and easier to pack

Cons: More expensive and less durable

Other fabrics

Polyurethane-coated nylon and cuben fiber, also called Dyneema, are alternative fabrics for those wanting ultralight tents. Cuben Fiber is much lighter than most PU-coated fabrics, making it a popular choice for ultralight backpacking and other weight-sensitive applications. However, Cuben Fiber can also be more expensive and more prone to abrasion than PU-coated fabrics.

Most people prefer plain polyester fabric for backpacking tents because it is the most affordable and is fairly durable. But the newest market research is showing that silicone-coated polyester, or silpoly, could beat each of the fabrics above because it is more durable, more affordable, and is more UV-resistant than silnylon.

River Country Products is currently testing silpoly fabric for use in current and upcoming lines of Trekker tents.

Which material do you prefer and why?

Posted on Leave a comment

A new venture with Life in a Pack

Trekker Palace in the Enchantments

We’re pleased to announced a new joint venture with Life in a Pack, the creator of LifePack™, an all-in-one survival pack, bug-out bag, backpacking kit, and adventure pack as first reviewed by Grim Granite. It has what you need to survive for 7 days in nearly any setting, and it has one of two new River Country Products tents: either the new silnylon Trekker Pyramid or the new silnylon Trekker Palace. Check out their video on YouTube for a first look!

The Trekker Pyramid is a one-person, two-layer silnylon tent that is completely supported by two trekking poles. Because of the high-quality silnylon, it is lighter than our original line of polyester trekking tents.

The Trekker Palace is the two-person version of this concept.

For most two-layer tents, you have to set up the first layer and then set up the second layer over the first.  The outer layer cannot be setup on its own.  These two-layer trekking pole tents solve this issues in the traditional design.  In addition, they are ultra-light, pack down to the size of a football, set up in 1-2 minutes, use trekking poles for support, and you can set up each layer separately or together.

These tents can be set up in three different configurations, the outer shell only, the inner mesh tent only, or both together for a two-layer tent.

Gear Included

In addition to a new line of tents, the LifePack has everything you need to survive for 7 days. It includes the following categories of items already packed and ready to go:
• Backpack (each pack includes one or more adult backpacks, and small daypacks)
• Tent (Includes Tent (1, 2, or 4 person) and Trekking Poles)
• Sleeping Gear (sleeping bag(s), sleeping pad(s), pillow(s), fleece blanket(s))
• Food (8 Freeze Dried Dinner and 6 breakfast servings per person, and a bonus additional 7 days of survival tablets)
• Water (4 cans of 50-year water per person, water filter, and water purification tablets, hydration pack…)
• Lighting and Electrical (A headlamp, a battery pack, a solar panel just for LifePack, and an emergency radio)
• Cooking and eating gear (pots, biofuel stove, gas burner stove, spork, knife, mug, water bottle…)
• Outerwear (poncho, gloves, beanie…)
• Sun and Bug Protection (Sunglasses, sunscreen, lip balm, bug repellent, bug mesh…)
• Fun and Personal (Life in a Pack playing cards, USB drive to store your digital items, journal, pencil)
• Camp Gear (camp chair, towel, multi-tool knife, compass, shovel, duct tape, sewing kit, and much more…)
• Fire (matches, lighter, fire starter, candles…)
• First Aid (everything from bandages to ibuprofen…)
• Personal Hygiene Kit (everything from a roll of TP to toothbrush and razor…)

If you would like to purchase either the Trekker Pyramid or the Trekker Palace, they will be first available through the LifePack website.

Posted on Leave a comment

Trekker Tent 3, Our Best 4-Man Backpacking Tent Yet

4 person trekking pole tent

After designing and testing this tent out ourselves we are excited to introduce you to our new favorite 4 man backpacking tent, the Trekker Tent 3.

Despite being a 4 person tent, the Trekker Tent 3 has one of the easiest set ups of all of our other backpacking tents, simply stake down the four corners, attach our trekking poles together (an extension is included if the tent is bought with poles) and then extend the single resulting trekking pole in the center of the tent.

We are also excited about this tent because of its weight. At 4lb 10oz, with stakes, it is one of the lightest per person 4 man tents out there. Only 1lb 2.5oz per person.

Lastly we love the vestibule, large mesh door and 6′ 8” peak height. We think you’ll love this 4 person trekking pole tent too.

Check out the Trekker Tent 3 here.

Posted on 5 Comments

$50 tent vs $600 tent

Trekker Tent 2 review

A couple of weeks ago, backpacking expert and outdoor adventurer Jessica “Dixie” Mills spotlighted the Trekker Tent 2 and compared it to the ZPacks Duplex, a similar ultralight trekking pole tent at more than 10 times the price. She started her YouTube video saying that she was curious how well an inexpensive, light-weight tent (under 3 lbs) would compare with a top-of-the-line model. After a brief introduction of the ZPacks, she followed with a more thorough review of the Trekker Tent 2. Although the Trekker Tent 2 doesn’t have the vestibule that Dixie liked on the Duplex, it passed her test for ease of setup, overall weight, interior roominess and compact size. After sleeping through a night of light rain, she was happy with how the Trekker Tent performed but didn’t stop there: she just had to give it the hose test! Of course, it passed that test, too, and we’re happy with how well our tent compares with the Duplex. But, don’t take our word for it, check out her video and subscribe to her Homemade Wanderlust page for more high-quality videos about backpacking, thru-hiking, and just plain enjoying life!